[译]用 Go 语言编写一个微服务博客 — 第四部分 — 使用 GoConvey 进行单元测试和模拟
11 min read
原文链接:Go microservices, part 4 - testing and mocking with GoConvey
应该使用什么方法来测试微服务?为一个特定领域制定测试策略时,是否需要考虑特殊的情况?在本博客系列的第 4 部分中,我们将讨论这个话题。
- 在单元层面中测试微服务的话题
- 通过 GoConvey 来编写 BDD 风格的单元测试
- 介绍一种模拟技术
由于此部分不会更改任何核心服务,所以不用进行基准测试。

微服务测试简介
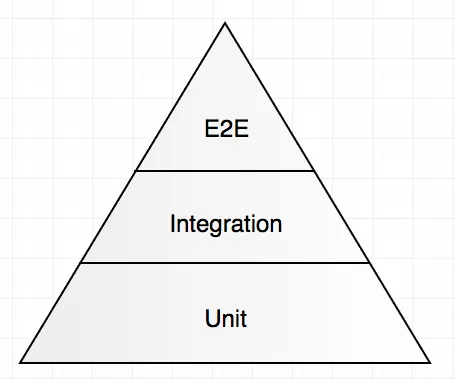
首先,应该牢记测试金字塔原则。

单元测试应该占您所有测试中的大部分,因为集成测试、端到端测试、系统测试和验收测试的开发和维护成本很高。
其次,微服务肯定会带来一些独特的测试挑战。而且其中一部分与传统测试一样,因为微服务有相当一部分也跟传统架构相同。话虽如此,我还是认为有许多微服务特性,超出了传统单元测试的范围,这是我们在博客系列的这一部分中要处理的。
无论如何,我想强调一些要点:
- 像往常一样进行单元测试:您的业务逻辑、转换器、验证器等没什么不同,只不过它们在微服务的上下文中运行;
- 集成组件,例如用于与其他服务通信、发送消息、访问数据库的客户端等等,应考虑到依赖注入和可模拟性;
- 如果不花费足够的时间来编写模拟,那么微服务的很多组件,如:配置访问、与其他服务交流、弹性测试等,可能很难进行单元测试。将这类测试保留到类似集成测试的测试中,在您的测试代码中,您实际上将依赖服务作为 Docker 容器来启动。它会有更大的作用,也更容易启动和运行。
代码
和以前一样,您可以从克隆的仓库中签出相应的分支,以预先获取此部分的完整源代码:
git checkout P4序言
Go 中的单元测试遵循 Go 作者决定的一些惯用模式。测试源文件通过命名约定标识。例如,如果我们想要测试 handlers.go 文件中的内容,则应该在同一目录中创建文件 handlers_test.go。那么我们就这样做吧。
我们将从一个该受批评的路径测试开始,该测试断言如果我们请求一个未知路径,则会得到一个 HTTP 404:
package service

import (
        . "github.com/smartystreets/goconvey/convey"
        "testing"
        "net/http/httptest"
)

func TestGetAccountWrongPath(t *testing.T) {

        Convey("Given a HTTP request for /invalid/123", t, func() {
                req := httptest.NewRequest("GET", "/invalid/123", nil)
                resp := httptest.NewRecorder()

                Convey("When the request is handled by the Router", func() {
                        NewRouter().ServeHTTP(resp, req)

                        Convey("Then the response should be a 404", func() {
                                So(resp.Code, ShouldEqual, 404)
                        })
                })
        })
}
此测试展示了 GoConvey 的 Given-When-Then 行为驱动结构,以及 So A ShouldEqual B 的断言样式。它还介绍了 httptest 包的用法,我们使用它来声明请求对象,并方便地对其响应对象进行断言。
通过移动到 accountservice 根目录并输入以下命令来运行它:
> go test ./...
?   	github.com/callistaenterprise/goblog/accountservice	[no test files]
?   	github.com/callistaenterprise/goblog/accountservice/dbclient	[no test files]
?   	github.com/callistaenterprise/goblog/accountservice/model	[no test files]
ok  	github.com/callistaenterprise/goblog/accountservice/service	0.012s
对 ./... 感到惊讶?它的意思是:我们告诉 go test 在当前文件夹和所有子文件夹中运行所有测试。我们也可以进入 /service 文件夹并输入 go test 来仅在该文件夹中执行测试。
由于 service 包是唯一带有测试文件的包,因此其它包报告:那里没有测试。到目前为止还不错!
模拟
我们上面创建的测试不需要模拟任何东西,因为实际调用不会到达我们在第 3 部分中创建的依赖于 DBClient 的 GetAccount 函数。对于真正想要返回一些数据的路径测试,我们需要以某种方式来模拟我们用来访问 BoltDB 的客户端。有很多在 Go 中进行模拟的策略。我将使用我最喜欢的包 stretchr/testify/mock 来展示。
在 /dbclient 文件夹中,创建一个名为 mockclient.go 的新文件,该文件将实现我们的 IBoltClient 接口。
package dbclient

import (
        "github.com/stretchr/testify/mock"
        "github.com/callistaenterprise/goblog/accountservice/model"
)

// MockBoltClient is a mock implementation of a datastore client for testing purposes.
// Instead of the bolt.DB pointer, we're just putting a generic mock object from
// strechr/testify
type MockBoltClient struct {
        mock.Mock
}

// From here, we'll declare three functions that makes our MockBoltClient fulfill the interface IBoltClient that we declared in part 3.
func (m *MockBoltClient) QueryAccount(accountId string) (model.Account, error) {
        args := m.Mock.Called(accountId)
        return args.Get(0).(model.Account), args.Error(1)
}

func (m *MockBoltClient) OpenBoltDb() {
        // Does nothing
}

func (m *MockBoltClient) Seed() {
        // Does nothing
}
MockBoltClient 现在作为我们定制的模拟正常工作。如上,此代码隐式实现了 IBoltClient 接口,因为 MockBoltClient 结构具有附加的方法,这些方法与 IBoltClient 接口声明的方法签名相同。
如果您不喜欢为模拟程序编写样板代码,建议您研究一下 Mockery,它可以为任何 Go 接口生成样板代码。
QueryAccount 函数的主体可能看起来有点奇怪,但这其实是 strechr/testify 生成的,我们可以控制它的生成代码。
编写模拟程序
让我们在 handlers_test.go 中创建另一个测试函数:
func TestGetAccount(t *testing.T) {
        // Create a mock instance that implements the IBoltClient interface
        mockRepo := &dbclient.MockBoltClient{}

        // Declare two mock behaviours. For "123" as input, return a proper Account struct and nil as error.
        // For "456" as input, return an empty Account object and a real error.
        mockRepo.On("QueryAccount", "123").Return(model.Account{Id:"123", Name:"Person_123"}, nil)
        mockRepo.On("QueryAccount", "456").Return(model.Account{}, fmt.Errorf("Some error"))

        // Finally, assign mockRepo to the DBClient field (it's in _handlers.go_, e.g. in the same package)
        DBClient = mockRepo
        ...
}
然后,将上面的 … 省略部分替换为另一个 GoConvey 测试:
Convey("Given a HTTP request for /accounts/123", t, func() {
        req := httptest.NewRequest("GET", "/accounts/123", nil)
        resp := httptest.NewRecorder()

        Convey("When the request is handled by the Router", func() {
                NewRouter().ServeHTTP(resp, req)

                Convey("Then the response should be a 200", func() {
                        So(resp.Code, ShouldEqual, 200)

                        account := model.Account{}
                        json.Unmarshal(resp.Body.Bytes(), &account)
                        So(account.Id, ShouldEqual, "123")
                        So(account.Name, ShouldEqual, "Person_123")
                })
        })
})
该测试对模拟程序已知的路径 /accounts/123 发出请求。在 When 代码块中,我们断言HTTP 状态,解码返回的 Account 结构,并断言字段与我们要求模拟返回的内容匹配。
我喜欢 GoConvey 和 Given-When-Then 编写测试的方式的原因是:它们非常易于阅读并且结构良好。
我们还可以添加另一个该受批评的路径,请求 /accounts/456 并断言返回 HTTP 404:
Convey("Given a HTTP request for /accounts/456", t, func() {
        req := httptest.NewRequest("GET", "/accounts/456", nil)
        resp := httptest.NewRecorder()

        Convey("When the request is handled by the Router", func() {
                NewRouter().ServeHTTP(resp, req)

                Convey("Then the response should be a 404", func() {
                        So(resp.Code, ShouldEqual, 404)
                })
        })
})
再次运行我们的测试:
> go test ./...
?   	github.com/callistaenterprise/goblog/accountservice	[no test files]
?   	github.com/callistaenterprise/goblog/accountservice/dbclient	[no test files]
?   	github.com/callistaenterprise/goblog/accountservice/model	[no test files]
ok  	github.com/callistaenterprise/goblog/accountservice/service	0.026s
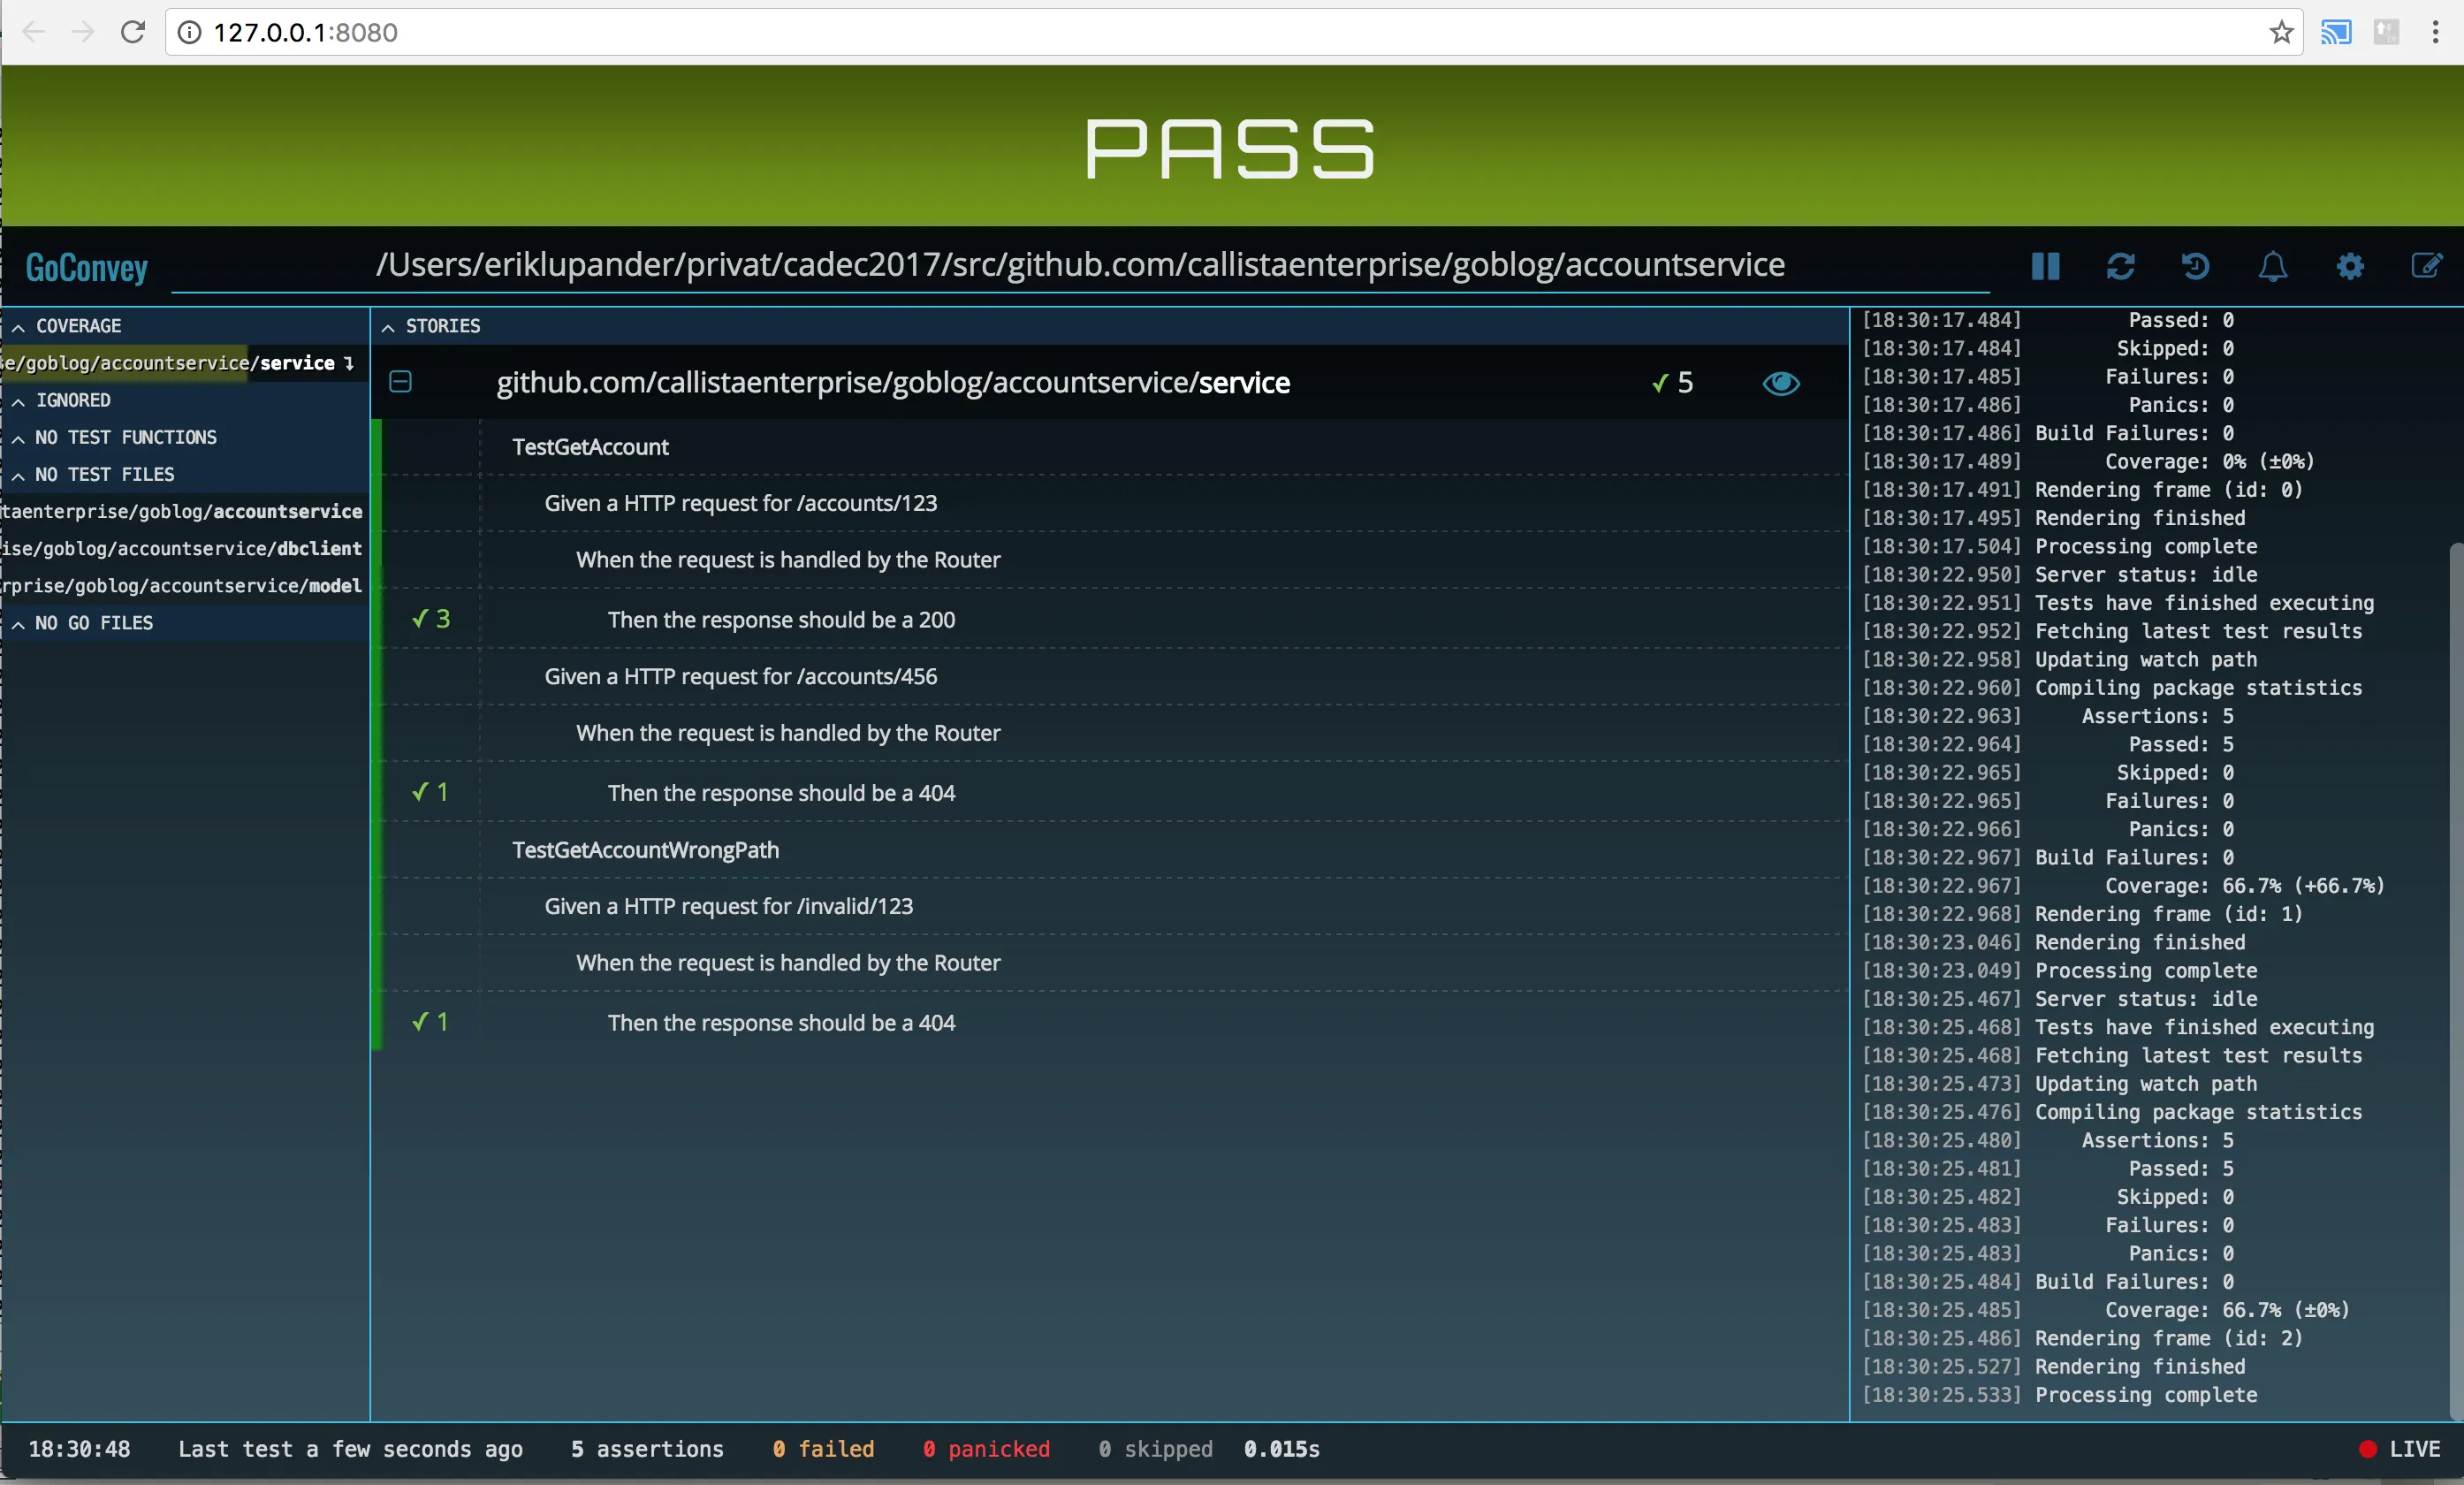
全部通过!GoConvey 实际上有一个交互式 GUI,每次保存文件时,它都可以执行所有测试。我不会详细介绍它,但是它的界面看起来像这样,并提供自动代码覆盖率报告之类的功能:

其他类型的测试
这些 GoConvey 测试是单元测试,尽管并不是每个人都以 BDD-style 编写它们。Golang 还有许多其他测试框架,使用您喜欢的搜索引擎进行搜索可能会给您许多有趣的选择。
如果我们以测试金字塔为准则,那么我们接下来就要编写集成测试,最后再使用 cucumber 之类的工具来进行验收测试。目前来说这超纲了,但是我们希望稍后再返回讨论有关集成测试的主题,后面我们可以在测试代码中启动一个真正的 BoltDB,也许可以通过使用 Go Docker Remote API 和一个预先定义好的 BoltDB 镜像来实现它。
集成测试的另一种方法是:自动化、Docker 化微服务环境的部署。请参考我去年写的博客文章。其中,我编写了一个小的 Go 程序来启动 .yaml 配置文件中规定的所有微服务,包括支持服务,然后对这些服务执行一些 HTTP 调用以确保部署是正确的。
总结
在这一部分中,我们使用第三方的 GoConvey 和 Stretcher/Testify/Mock 包编写了我们的第一个单元测试。我们将在博客系列的后续部分中编写更多测试。
在接下来的部分,是时候使用我们心心念念的 Docker Swarm 来启动、运行和部署微服务了。